
Are you worried about the security of your WordPress website?
One simple step you can take is to disable directory browsing.
By doing so, you’ll prevent unauthorized access to sensitive information and ensure that your website remains secure.
In this article, we’ll show you how to disable directory browsing in WordPress using two easy methods: editing the .htaccess file and using a plugin.
Read on to learn more.
What is Directory Browsing in WordPress?
Directory browsing is a feature that allows anyone to see a list of files and folders in your WordPress website’s root directory.
This can potentially expose sensitive information and compromise the security of your website.
To prevent this from happening, it’s essential to disable directory browsing in WordPress.
What Does Disabling Directory Browsing in WordPress Do?
Disabling directory browsing in WordPress helps protect the security of your website by preventing unauthorized access to sensitive information.
When directory browsing is enabled, anyone can see a list of files and folders in your website’s root directory.
By disabling this feature, you’ll ensure that sensitive information about your website remains private and secure.
You can simply see any website directory folder by just typing the website URL and then the directory name.
If the website has disabled directory browsing, you will see the forbidden error.
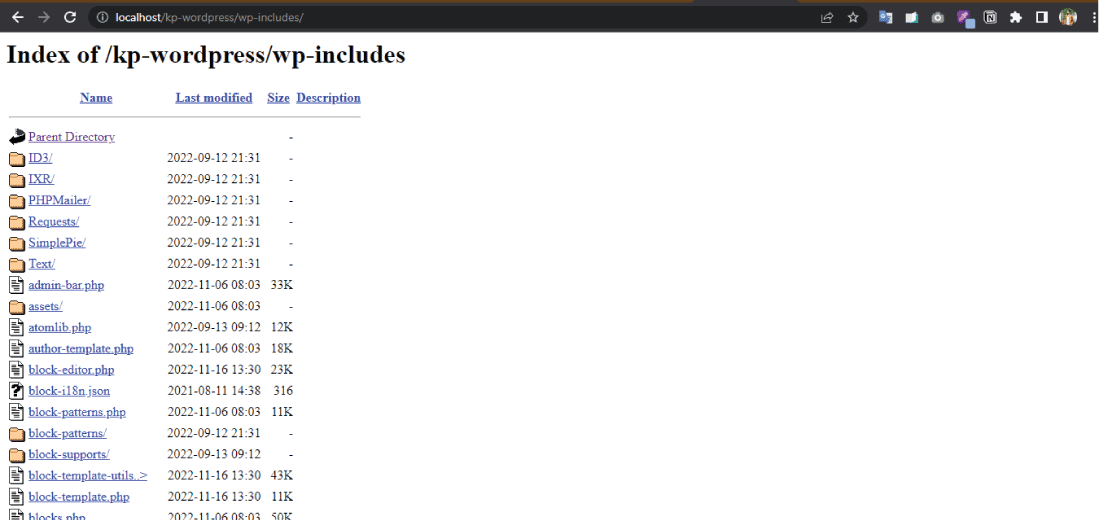
Here is an example of how to do directory browsing:
https://your-website-name.com/wp-includes
In this article, we’ll explain what disabling directory browsing in WordPress does and how to do it using two simple methods.
How to check directory browsing is enabled in WordPress?
To check if directory browsing is enabled in WordPress, simply access your website’s root directory using your web browser.
If you can see a list of files and folders, then directory browsing is enabled.
You can simply see any website directory folder by just typing the website URL and then the directory name.
Here is an example of how to do directory browsing:
https://your-website-name.com/wp-includes

On the other hand, if you see a 404 error page or a forbidden page, it means that directory browsing is disabled.

We’ll show you how to disable directory browsing in WordPress if it’s enabled.
How to Disable Directory Browsing in WordPress?
Disabling directory browsing in WordPress is a simple and effective way to enhance the security of your website by preventing unauthorized access to sensitive information.
Now let’s see the two methods on how to disable directory browsing in WordPress.
Disabling Directory Browsing using the Plugin:
You can disable the directory browsing using the plugin. This method is very simple to use for beginners.
Here are the steps to disable directory browsing in WordPress using a plugin:
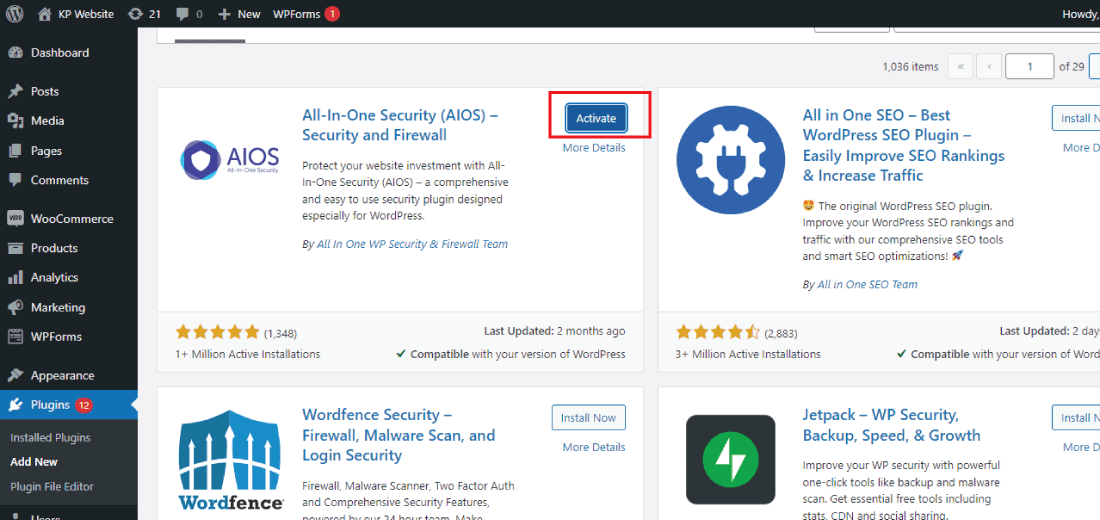
1. Install the plugin: The first step is to install a plugin that can help you disable directory browsing in WordPress.
A popular option is the All In One WP Security & Firewall plugin.

2. Activate the plugin: After installing the plugin, activate it from the plugins page in your WordPress dashboard.
3. Go to the settings page: Once the plugin is activated, go to the settings page and look for the directory browsing feature.
4. Enable the feature: To disable directory browsing, simply enable the directory browsing feature in the plugin settings.
Once you’ve enabled the feature, be sure to save the changes before you exit the settings page.
By following these steps, you can easily disable directory browsing in WordPress using a plugin.
The process is straightforward and can be completed in just a few minutes.
Disabling Directory Browsing by editing the .htaccess file:
This method is also very simple but it is better to hire or take the help of a WordPress developer.
Here we are going to provide the simple steps for editing the .htaccess file.
1. Access the .htaccess file: The first step is to access the .htaccess file in the root directory of your WordPress website.
You can do this using an FTP client or the file manager in your hosting control panel.
2. Add the code: Once you’ve accessed the .htaccess file, add the following code to it:
Options -Indexes
3. Save the file: After adding the code, save the .htaccess file and close it.
To ensure that the changes have taken effect, access your website’s root directory using your web browser.
If you see a 404 error or forbidden page, it means that directory browsing has been disabled.
By following these simple steps, you can easily disable directory browsing in WordPress by editing the .htaccess file.
The process is quick and straightforward and can be completed in just a few minutes.
Want to add an extra security layer to your WordPress, read this article: WordPress Security: 5 Best Plugins Tested on Live Sites
Conclusion:
In conclusion, disabling directory browsing in WordPress is an important step in enhancing the security of your website.
By preventing unauthorized access to sensitive information, you can ensure that your website remains protected and secure.
In this article, we showed you how to disable directory browsing in WordPress using two simple methods: editing the .htaccess file and using a plugin.
No matter which method you choose, the process is straightforward and can be completed in just a few minutes.
We hope that this article has been helpful in showing you how to secure your WordPress website.
